Have you been planning to make a Christmas Tree with your SB supplies? Craft it yourself for the mantel or something for your desk at work or even as a gift! Here is a wonderful Tutorial by our chosen Inspirational Scrapper for Dec 08!
Things you would need:
Pins
Buttons
Foam (any shape you like. I'm using a cone shaped)
Foam (for the pot)
Satay Stick
Paint
Pattern Paper
Any Christmas embellishments that you love to use
Pot
Pins
Buttons
Foam (any shape you like. I'm using a cone shaped)
Foam (for the pot)
Satay Stick
Paint
Pattern Paper
Any Christmas embellishments that you love to use
Pot
Step 1:
Paint the foam green or any colour you like, so that when there is gap when you arrange the embellishments, you will not be able to see the foam.

Step 2:
Start to use all the embellishments that you wish to be on the foam. I have used flowers, leaves and buttons to decorate it. Instant of using glue, use pin to pin them down onto the foam. This way, you can reuse all the embellishments if you want.

Step 3:
This is how it look like after everything is in place.

Step 4:
Select any pot that will be big enough to hold the weight of the foam, and start decorating it by using any pattern paper that you like.

Step 5:
Finally, to assemble everything together, poke the satay stick onto the base of the Chirstmas tree and stick it into the foam in the pot. As the foam from the pot can be seen clearly, use any of the old or reuse papper to cover it as much as possible.


And......here are the Designer's takes for this tutorial

Paint the foam green or any colour you like, so that when there is gap when you arrange the embellishments, you will not be able to see the foam.

Step 2:
Start to use all the embellishments that you wish to be on the foam. I have used flowers, leaves and buttons to decorate it. Instant of using glue, use pin to pin them down onto the foam. This way, you can reuse all the embellishments if you want.

Step 3:
This is how it look like after everything is in place.

Step 4:
Select any pot that will be big enough to hold the weight of the foam, and start decorating it by using any pattern paper that you like.

Step 5:
Finally, to assemble everything together, poke the satay stick onto the base of the Chirstmas tree and stick it into the foam in the pot. As the foam from the pot can be seen clearly, use any of the old or reuse papper to cover it as much as possible.


And......here are the Designer's takes for this tutorial
Cabbie's Christmas Tree
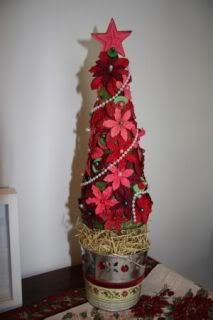
Designer Cabbie created her Awesome Christmas Tree out of 3 round styrofoam balls and adhered gold icicles onto it!
Designer Cabbie created her Awesome Christmas Tree out of 3 round styrofoam balls and adhered gold icicles onto it!

Felicia's Christmas Tree
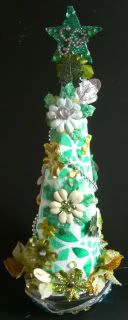
Designer Felicia made her Beautiful Christmas Tree out of a cardstock, glimmer misted a pattern and embellished it!
Designer Felicia made her Beautiful Christmas Tree out of a cardstock, glimmer misted a pattern and embellished it!
Liza's Christmas Tree
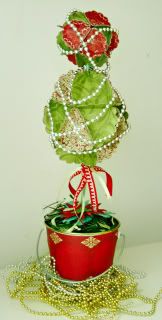
Designer Liza made her unique Christmas Tree out of scalloped papers and shaped them into 2 different sized Paper Globes!
Now that you've seen ours, we would love to see your take on this tutorial.
Do share it with us, email us at artzdescrap@yahoo.com.sg
Happy Creating!!!


1 comment:
wow! i love the different takes on the christmas trees! they look really interesting! hope others will try out this tutorial and add some christmas feel in their homes! :)
Post a Comment