
Materials / Supplies needed:
3 or 4 double-sided Patterned Papers
Embellishments
Instructions:
1. Cut the PPs to size:
- 9"x9” - 1 no.
- 7.5”x7.5” – 1 no.
- 6”x6” – 1 no.
- 6”x6” – 1 no. for the lid

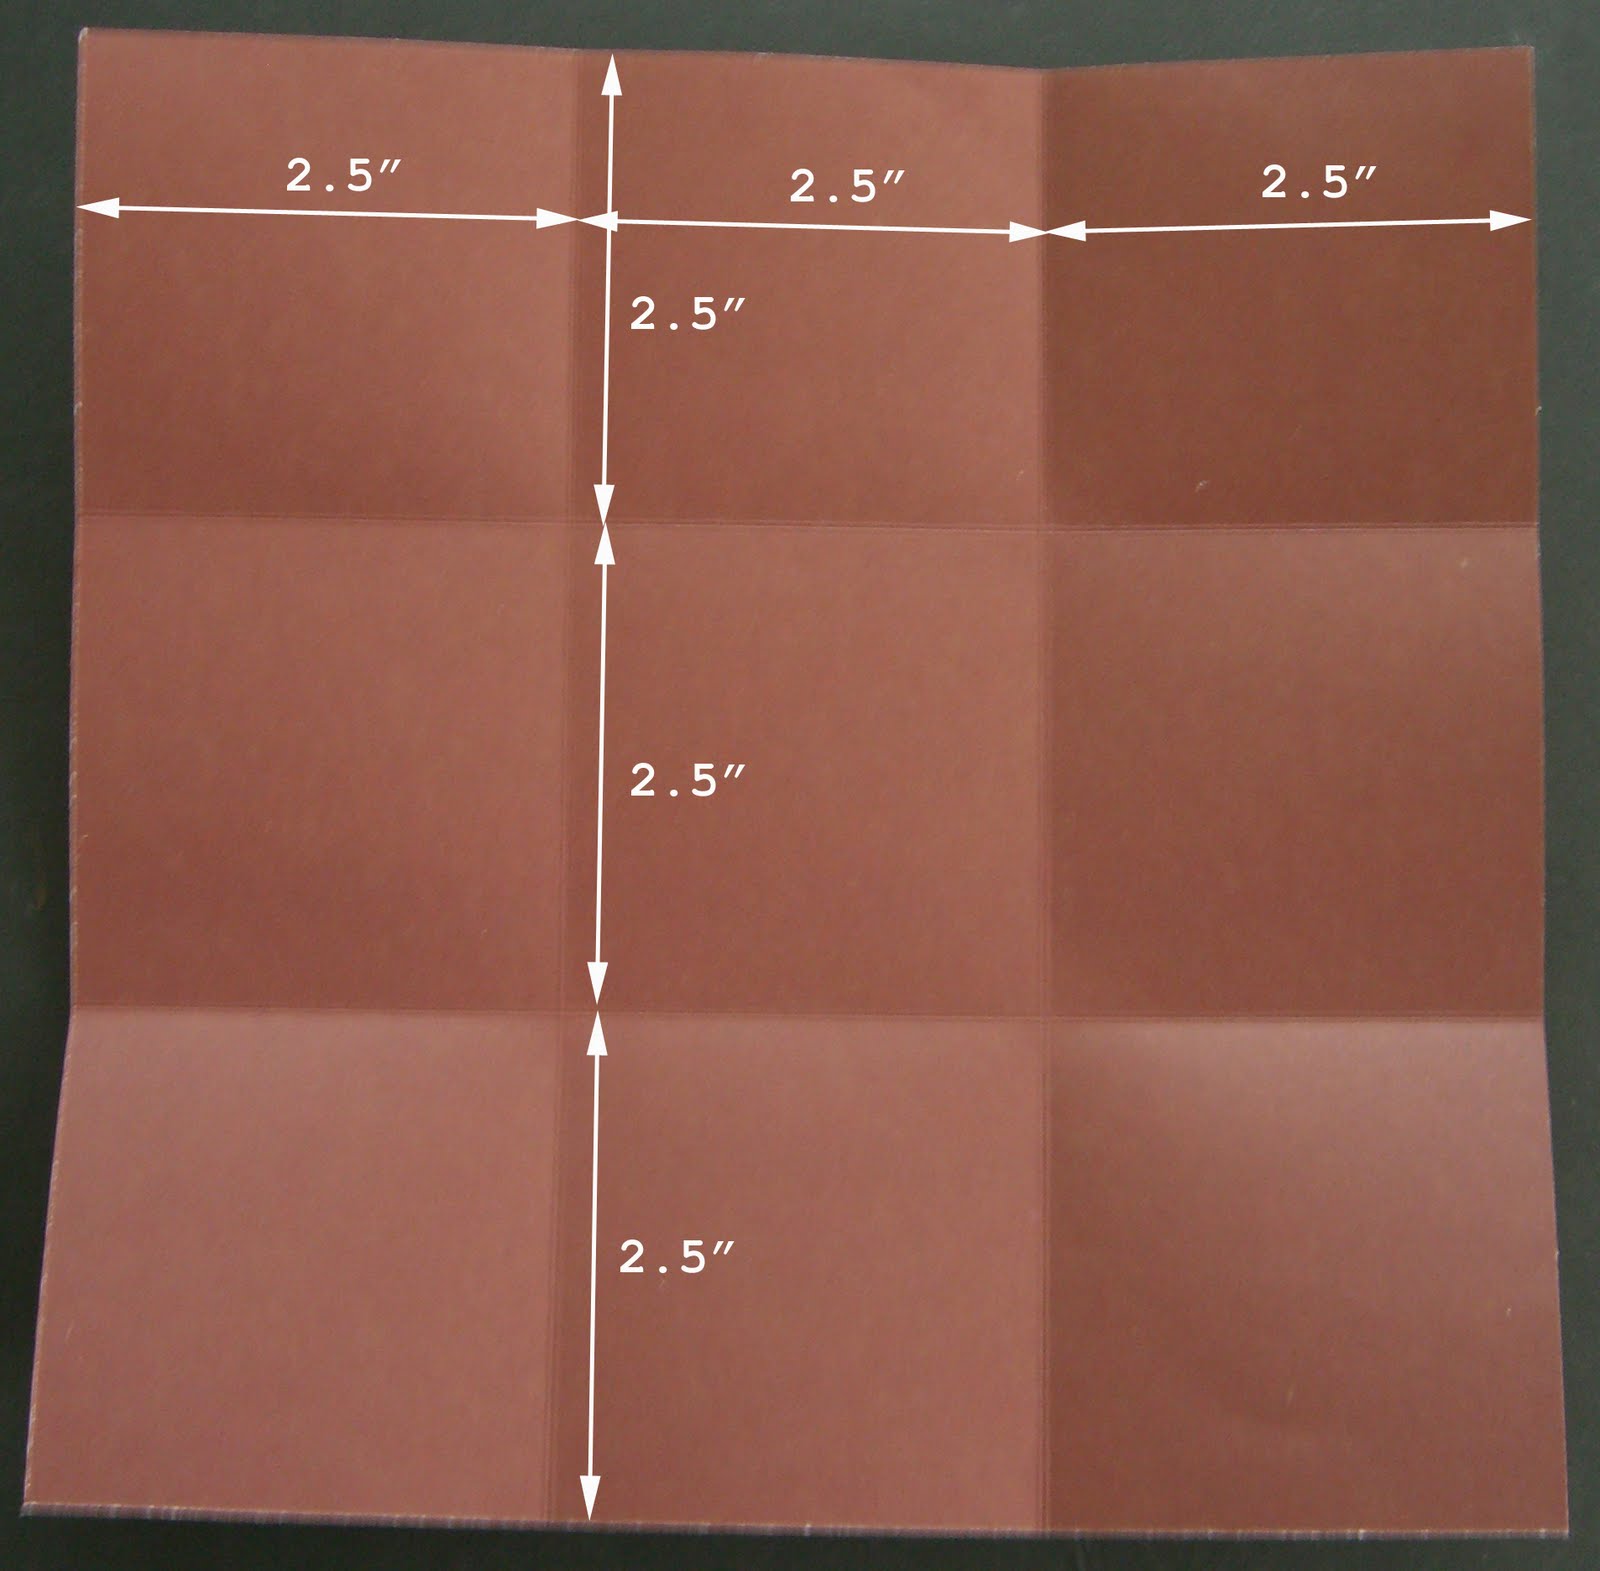
2. Score lines on the PPs to create 9 squares.
a)9”x9” – Score at 3” intervals

b)7.5”x7.5” – Score at 2.5” intervals
c)6”x6” – Score at 2” intervals

3. Cut the 4 corner squares from all 3 PPs to form t-shaped PPs.


4. To create the lid, score lines at 1.5” intervals. Fold the 4 corner squares to create a diagonal fold on them.

5. Add tape glue to corner triangles to create the lid.

6. Here’s how the lid looks when completed.

7. Apply glue to the back of the centre square of the smallest t-shaped PP to the centre square of the medium t-shaped PP to adhere them together. Adhere the centre square of the medium t-shaped PP to the centre square of the large t-shaped PP. Here’s how it should looks when all the pages are adhered together.

8. Fold up the pages to form the sides of the box and fit the lid over them. Here’s the finished explosion box, embellish with photos and other embellishments as desired!!

Here's my completed Explosion Box!!


Here are our takes for this tutorial.


Do share your take with us, email us at artzdescrap@yahoo.com.sg
Do share your take with us, email us at artzdescrap@yahoo.com.sg


5 comments:
I love this tutorial!!
Thank you so much for the tutorial!! This is a fabulous little box and would make a very nice gift!! Thanks again!!!
Glad you like the tutorial, Fern! :)
Hi. I loved your Blog. I have one www.criartezzanato.blogspot.com
Hugs,
val
This explosion box looks like a fun and creative project.
Post a Comment