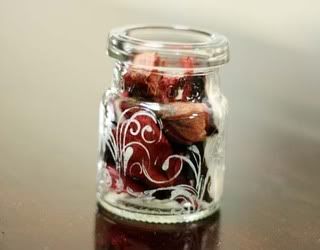
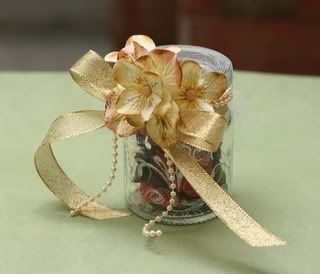
Wednesday, December 31, 2008

Wishing our Friends and Supporters

Photobucket

May this New Year bring more Joy, Blessings and Continued Prosperity!!!

Saturday, December 20, 2008

WISHING OUR FRIENDS AND SUPPORTERS
A JOYOUS CHRISTMAS!
Photobucket

Monday, December 15, 2008

Dec 08 Inspirational Scrapper

Artz de Scrap's Chosen Inspirational Scrapper for December 08 is

Michelle Lui

Photobucket

Hi everyone, my name is Michelle and I'm from Singapore. I started scrapbooking about two years ago and is now seriously addicted to this lovely hobby. I don't really have a fixed style for any of my layout or altered projects. Sometimes its simple and sometimes its complex.
I am very honored to be part of this team to share with you some the projects that I've done. You can visit my blog to see what else I've been up to.
Happy Scrapping everyone!

O' Christmas Tree Tutorial

Have you been planning to make a Christmas Tree with your SB supplies? Craft it yourself for the mantel or something for your desk at work or even as a gift! Here is a wonderful Tutorial by our chosen Inspirational Scrapper for Dec 08!

Things you would need:

Pins
Buttons
Foam (any shape you like. I'm using a cone shaped)
Foam (for the pot)
Satay Stick
Paint
Pattern Paper
Any Christmas embellishments that you love to use
Pot

Step 1:

Paint the foam green or any colour you like, so that when there is gap when you arrange the embellishments, you will not be able to see the foam.
Photobucket

Step 2:

Start to use all the embellishments that you wish to be on the foam. I have used flowers, leaves and buttons to decorate it. Instant of using glue, use pin to pin them down onto the foam. This way, you can reuse all the embellishments if you want.
Photobucket

Step 3:

This is how it look like after everything is in place.
Photobucket

Step 4:

Select any pot that will be big enough to hold the weight of the foam, and start decorating it by using any pattern paper that you like.
Photobucket

Step 5:

Finally, to assemble everything together, poke the satay stick onto the base of the Chirstmas tree and stick it into the foam in the pot. As the foam from the pot can be seen clearly, use any of the old or reuse papper to cover it as much as possible.
Photobucket

Photobucket

And......here are the Designer's takes for this tutorial

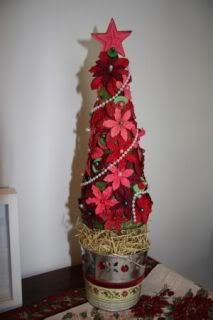
Cabbie's Christmas Tree
Designer Cabbie created her Awesome Christmas Tree out of 3 round styrofoam balls and adhered gold icicles onto it!
Photobucket

Felicia's Christmas Tree
Designer Felicia made her Beautiful Christmas Tree out of a cardstock, glimmer misted a pattern and embellished it!
Photobucket

Liza's Christmas Tree
Designer Liza made her unique Christmas Tree out of scalloped papers and shaped them into 2 different sized Paper Globes!
Photobucket

Now that you've seen ours, we would love to see your take on this tutorial.

Do share it with us, email us at artzdescrap@yahoo.com.sg

Happy Creating!!!

Monday, December 8, 2008

Submissions for Challenge #13

These are the submissions from our lovely participants


Sunday, December 7, 2008

Announcement

Our Resident Designer, Wati Basri will not be renewing her term with Artz de Scrap.
With her current commitments, she has decided to leave the team.

Here's wishing Wati all the best in her endeavours!
We wish to thank her for all her contributions to Artz de Scrap.
We will definitely miss her!

Monday, December 1, 2008

Altered Box Challenge

Need Ideas for DIY Gifts this Christmas??? How about altering or recycling boxes as gifts or packaging for gifts???

Are you ready for our next challenge??

It's a simple challenge this month! We would like you to alter any tissue box or even recycle it into Gifts or Gift packagings!

However, Originality will be a factor in determining the winner for this challenge!

We can't wait to see your takes on this challenge!
Do link your submissions (on your blog) in the comments section or email us a copy to
artzdescrap@yahoo.com.sg for a chance to win a wonderful RAK from our sponsor.

Here are our DT's takes for this Challenge!

Designer Cabbie recycled an empty clock box into a Gorgeous Tissue Box! Wouldn't this make a Wonderful Christmas Gift?

Photobucket

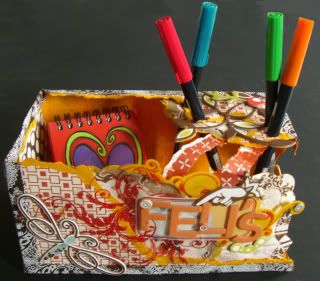
Designer Felicia recycled an empty tissue box and altered it into a Very Beautiful and Practical organizer. This is sooo perfect as a personal charming gift for Christmas!

Photobucket

Designer Liza recycled an empty tissue box into a Beautiful and Sweet Box as part of a gift hamper! Now, which scrapper wouldn't want this as a Christmas Gift?

Photobucket

Now that you've seen our takes, do share with us your recycling and altering ideas!!!

You have till Wednesday 31st December 2008 Midnight Eastern Time.
International scrappers are most welcome to join in.

The winner will be voted by the Designers and will be
announced here on the 1st of January 2009.

Sneak Peek of our next tutorial
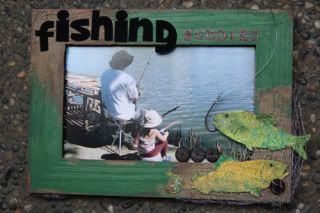
Photobucket

Do check back here on the 15th of December 08 for this wonderful tutorial by our next chosen Inspirational Scrapper

Winner for Challenge #12

Thank you for all your Gorgeous submissions of your takes on the altered frames! We hope you had fun! The Design Team has voted and the winner is ..................

Betchay

Photobucket

Congratulations!!!
You've won yourself a RAK sponsored by Our Craft Place

Photobucket

Thanks again for playing along with us and hope to see more precious & lovely submissions for Challenge #13!

Saturday, November 29, 2008

Calling for Designers

We are looking for talented Scrappers to be part of our inspirational group for a period of 6 months starting Jan 09 to Jun 09.

You will be receiving the following

- Recognition and Exposure

- All alterable items for the Challenges (when there are giveaways).

- A RAK as a token of appreciation from Artz de Scrap

- Discounts at Artz de Scrap's associates's esteemed online stores.

In turn, you are required to

- Submit all your monthly submissions due on time and submit all the mid-month tutorials.

- Host 1 tutorial in a pre-determined month within your term.

- You will also have to post all sneaks and your takes on the challenges on your respective blogs and to promote Artz de Scrap.

Interested?
If so, THIS is what you need to do:
Just email us your best three samples of your altered work (No LOs), your name, your address and your blog URL to artzdescrap@yahoo.com.sg by the 25th of Dec 08.
**Note: All altered work submitted MUST not be from any of Artz's previous challenges!**

The 2 chosen designers will be contacted BY December 26th and will be revealed on the blog on January 1st 2009!!!

Thursday, November 27, 2008

Submissions for Challenge #12

These are the submissions from our lovely participants

Saturday, November 15, 2008

Nov - Dec 08 Inspirational Scrapper

Artz de Scrap's Chosen Inspirational Scrapper for November 08 is


Photobucket

I am a scrapper from The Philippines, a wife to a wonderful and supportive husband named Bryan, and a mother to a beautiful and sweet little girl named Nicole Breanna. I started scrapbooking in 2005 after trying to organize my baby’s photos but have been left unsatisfied with ordinary photo albums. I like to give my pages dimension with lots of detail. I rarely plan my pages – I let a photo or a patterned paper inspire me and I take it from there.

Aside from being an avid scrapbooker who dreams and obsesses about patterned papers and page ideas all day, I am also a pianist and a partner in an events management company. I’m also a very active person who frequents the gym, and joins 10k marathon runs whenever I can.

I am fortunate to be currently designing for Prima Marketing, Webster’s Pages, October Afternoon, Badgirlskits, and Scrap-n-Crop. I have also been named as one of the 2008 Memory Makers Magazine Masters. I am fortunate to have some of my layouts published in Memory Makers Magazine, Scrapbook Trends Magazine, Sommerset Memories, Scrapbook and Cards, Scrapbook Dimensions, and Scrapbook Memories. I am thankful for the blessings which have come my way as an artist and will continue to be thankful for the happiness and fulfillment that I get from this craft.

Days to Remember Tutorial

Supplies Required

Melissa Frances Paper
Melissa Frances Vintage Frame
Jeni Bowlin Mini Calendar Set
Music Sheet
Fancy Pants Pink Polka Dot Ribbon
Wooden Frame (fit for a 4x6 photo)
Maya Road tree and bird chipboard white,
country blue, pink, and gold acylic paint
7 gypsies gold wax
Lace Prima flowers and brad

Tools Required: Foam Brush , Glue , Hole Puncher & Heat Gun

Step 1: remove the glass from the frame and cover the backing with patterned paper

Photobucket

Step 2: Paint the frame with white acrylic paint. Once dry, add some pink and blue paint for a weathered look.

Step 3: Use white paint as glue and paint the back side of torn music sheet and adhere to the frame. Paint the edges of the music sheet with white to make it blend in with the frame.

Photobucket

Step 4: Punch holes on the calendar sheets and stamp the back of the calendar sets with a journaling stamp. Be sure to use also the last piece (product packaging) of the set and stamp at the blank side. Make sure to flip the calendar the right way before stamping so that when you lift the card upwards the print is correct.

Step 5: Tie the calendar sets loosely with pink ribbon. The front and back of the set should look like the photos below.

Photobucket

Step 6: Add some light blue lace on the upper right corner of the frame again using white acrylic paint as adhesive.

Photobucket

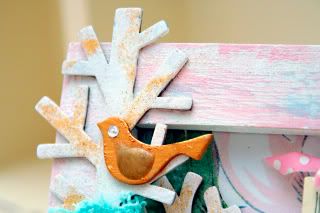
Step 7: Paint the trees with white acrylic paint and add a little distressing powder and set with heat gun.

Step 8: Paint the bird with gold. Add the feather using melted gold wax. Add bling for the eye.

Step 9: On the lower left corner add the applique, lace, flowers and brads.

Photobucket

Photobucket

And.....here are our takes

Cabbie's

Photobucket

Felicia's

Photobucket

Liza's

Photobucket

We would love to see your take on this tutorial.

Do share it with us, email us at artzdescrap@yahoo.com.sg


Happy Altering!!!

Saturday, November 1, 2008

Altered Frame Challenge

Ready for the next Challenge?

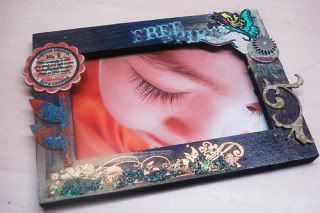
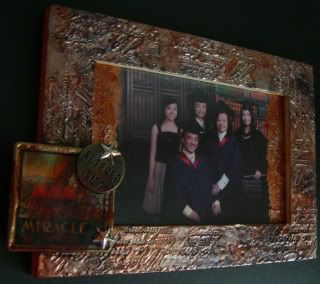
For this month's challenge, we would like you to alter any frame BUT you must apply any type of paint in your creation.

We are giving out 6pcs of Wooden Frames to the 1st 6 (six) scrappers who register with us through our email at artzdescrap@yahoo.com.sg
(Pls state Registering for Challenge #12 in your email header)

Challenge: To Alter a frame.

Here are ours

Cabbie's

Photobucket

Felicia's

Photobucket

Liza's

Photobucket

Wati's

Photobucket

Update: Due to the overwhelming response, we regret to inform you that the giveaways have all been taken up.
If you are not the 1st 6 registrants, no problem!
Just use your own frame and challenge your creativity! Do link your submission (on your blog) in the comments section or email us a copy to artzdescrap@yahoo.com.sg for a chance to win a RAK. You have till Sunday 30th November 2008 Midnight Eastern Time.
International scrappers are most welcome to join in.
The winner will be voted by the Designers and will be announced here on the 1st of December 08.

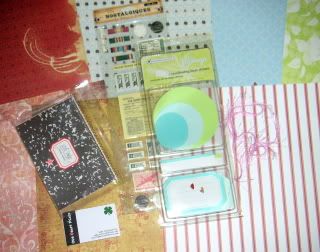
Sneak Peek of our next tutorial

Photobucket

Do check back here on the 15th of November 08 for this wonderful tutorial by our next chosen Inspirational Scrapper

Winner for Challenge #11

Thank you for all your Gorgeous submissions of your takes on the altered bottle! We hope you had fun! The Design Team has voted and the winner is ..................

CS Lau
Photobucket

Congratulations!!!
You've won yourself a RAK sponsored by Our Craft Place

Photobucket

Thanks again for playing along with us and hope to see more precious & lovely submissions for Challenge #12!

Thursday, October 23, 2008

Submissions for Challenge #11

These are the submissions from our lovely participants

Wednesday, October 15, 2008

Oct - Nov 08 Inspirational Scrapper

Artz de Scrap's Chosen Inspirational Scrapper for October 08 is

Photobucket

Hi there, I'm Katherine from Penang, Malaysia. I work full-time and I'm mummy to a 3-year-old hyper-bunny who is my main source of inspiration. My daughter is the Art Director of many of the creative projects we churn out together.

I love all things art related, be it playing, creating, or savouring creations of others.I started off with scrapbooking, mainly to preserve memories of my daughter growing up but this has expanded into other related stuff namely altered art, repurposing items and photography.

I only wish I had more time to play! It is truly an honour to be featured here as I have also drawn much inspiration from the Artz de Scrap features.

Potpourri Tutorial

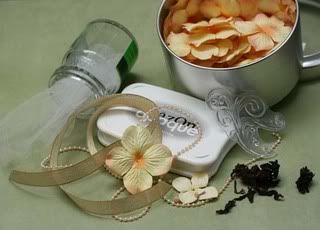
Supplies
Bottle (of your desired size)
Staz-On Inkpad
Clear Stamp (unmounted)
Netting/Lace
Rubberband
Ribbons
Pearl Trims
Flowers
Dried Flowers/Leaves or Used Tea Leaves
Essential Oil/Room Fragrance

Photobucket

Method
Soak bottle to remove label and ensure that it is completely dry.
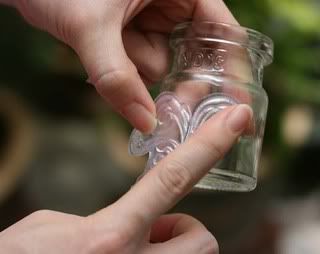
Ink unmounted clear stamp with Staz-On Ink and carefully position stamp onto the outside bottle, pressing on the stamp in gently but firmly to transfer the image.

This needs to be done very carefully to ensure image is not smudged.

Photobucket

Repeat stamping around the bottle and allow the stamped images
to dry thoroughly before further handling.

Fill bottle with dried flowers, leaves and/or dried used tea leaves.

You can repurpose your old bouquet of flowers for this.

Use of dried used tea leaves is also great as the leaves
would have lost most of its aroma by then.

Photobucket

Drop a few drops of your favourite essential oil or room fragrance into the filled bottle.
Place netting or lace over the bottle opening and secure with a rubberband onto the neck of the bottle, then trim the leftover netting/lace near to the rubberband but be sure to leave some allowance. Tie a ribbon around the bottle neck to cover up the rubberband. You can also dress it up further with a string of pearl trimming over the ribbon.

Distress some paper flowers (as many as you want) and adhere them over the ribbon and various spots around the bottle and embellish as you please.

All done!

Photobucket

Additional Tips:
You can use rub-ons and alcohol inks instead of, or with the stamping on the bottle.

And.....here are takes

Cabbie's

Photobucket
Felicia's

Photobucket

Liza's

Photobucket

We would love to see your take on this tutorial. Do share it with us, email us at artzdescrap@yahoo.com.sg
Happy Altering!!!

Monday, October 6, 2008

Altered Bottle Challenge

October Greetings to All!!

Ready for the next challenge??

It would be a very simple challenge this month! We would like you to alter any bottle!

However, Originality will be a factor in determining the winner for this challenge!

We can't wait to see your takes on this challenge!

Do link your submissions (on your blog) in the comments section or email us a copy to
artzdescrap@yahoo.com.sg for a chance to win a RAK.

Here are our takes

Cabbie's altered bottle

Photobucket

Felicia's altered bottle

Photobucket

Liza's altered bottle

Photobucket

Wati's altered bottle

Photobucket

You have till Friday 31st October 2008 Midnight Eastern Time.
International scrappers are most welcome to join in.

The winner will be voted by the Designers and will be
announced here on the 1st of November 08.

Sneak Peek of our next tutorial
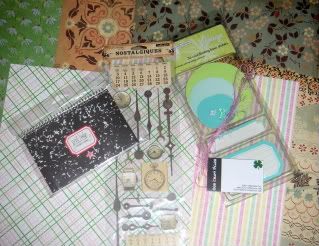
Photobucket

Do check back here on the 15th of October 08 for this wonderful tutorial by our next chosen Inspirational Scrapper