Here are the takes from our lovely scrappers
Saturday, April 25, 2009
Wednesday, April 15, 2009
April 09 Inspirational Scrapper
Artz de Scrap's Chosen Inspirational Scrapper for April 09 is
Nina Pateña
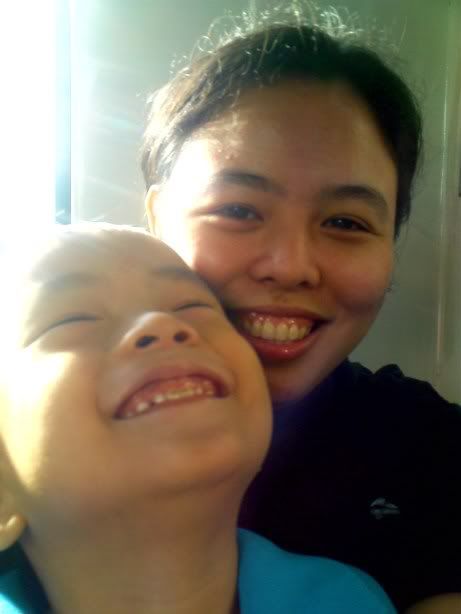
Hi. My name is Nina Pateña and I'm a stay-at-home mom and homeschooler to a 5-year-old boy named Matthew. I live in the Philippines with my husband, who works in Philippine Airlines. He travels a lot because of his job, and sometimes, we're lucky enough to be able to tag along. Scrapbooking, stamping and altered art are my passions. I consider myself as a "forever" newbie because I try to keep improving my craft and feel that there's always something new to learn. My first love is still reading and the books on my shelf are on parenting, writing, art journals, altered art, fantasy and manga.
I'm a core team member of PinoyScrapbookers' KAYA challenge blog and currently a DT member of Butterfly Crafts and Ad This.
Nina Pateña

Hi. My name is Nina Pateña and I'm a stay-at-home mom and homeschooler to a 5-year-old boy named Matthew. I live in the Philippines with my husband, who works in Philippine Airlines. He travels a lot because of his job, and sometimes, we're lucky enough to be able to tag along. Scrapbooking, stamping and altered art are my passions. I consider myself as a "forever" newbie because I try to keep improving my craft and feel that there's always something new to learn. My first love is still reading and the books on my shelf are on parenting, writing, art journals, altered art, fantasy and manga.
I'm a core team member of PinoyScrapbookers' KAYA challenge blog and currently a DT member of Butterfly Crafts and Ad This.
DIY Banner Tutorial
Materials needed:

illustration board (may be substituted with cardstock or chipboard); patterned paper; acrylic paint; paintbrush or foam brush; embellishments; rickrack or ribbon (not in photo are letter stickers and adhesive).
Step-by-step instructions:
1. Think of the theme for your banner. (My son's 5th birthday is in April.) Gather your materials for your theme.
2. Count how many individual pieces you need for your banner and cut illustration board into small triangles. Here's a trick for cutting triangles: First cut into small rectangles. Cut from one corner to the middle of the opposite side.
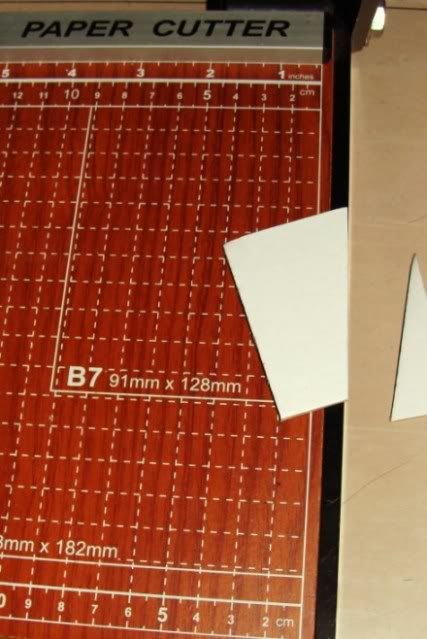
Invert and cut starting from what used to be the middle of the opposite side to the other corner.
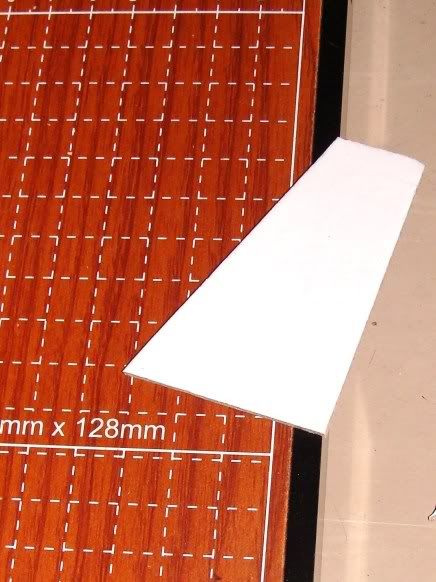

3. Cover cut triangles with patterned paper. It's better if you cut from the back side of the triangle so that you don't cut the edges too closely. Sand edges from the front of the triangle.


illustration board (may be substituted with cardstock or chipboard); patterned paper; acrylic paint; paintbrush or foam brush; embellishments; rickrack or ribbon (not in photo are letter stickers and adhesive).
Step-by-step instructions:
1. Think of the theme for your banner. (My son's 5th birthday is in April.) Gather your materials for your theme.
2. Count how many individual pieces you need for your banner and cut illustration board into small triangles. Here's a trick for cutting triangles: First cut into small rectangles. Cut from one corner to the middle of the opposite side.

Invert and cut starting from what used to be the middle of the opposite side to the other corner.


3. Cover cut triangles with patterned paper. It's better if you cut from the back side of the triangle so that you don't cut the edges too closely. Sand edges from the front of the triangle.

4. A trick for applying rickrack or ribbon is you cut cardstock or cardboard the same size as the back of the triangle. Sandwich the rickrack or ribbon between the back of the triangle and the cardstock or cardboard.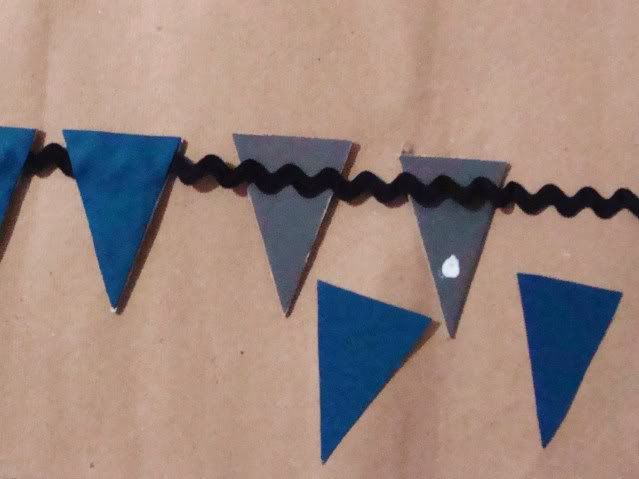
5. Decorate triangles with the individual letters and/or numbers as well as embellishments for your theme. Some fun themes could be "create", "inspire" or even occasions like anniversaries or Halloween.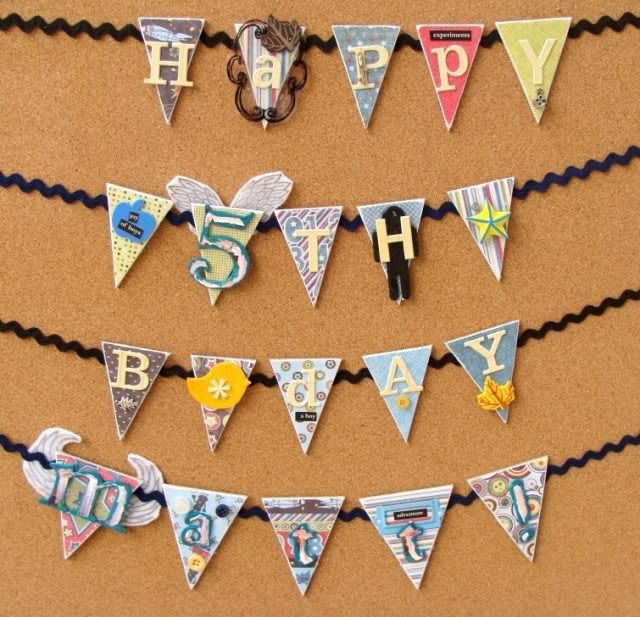
Have fun!
Here are our takes for this tutorial
Wednesday, April 1, 2009
Altered Notebook Challenge
Are you ready for
Artz de Scrap's April Challenge?
Artz de Scrap's April Challenge?
Challenge: To alter any sized Notebook
Color Theme : Orange, Greens or Browns
(Originality will be a factor in determining the winner for this challenge!)
We can't wait to see your takes on this challenge!
Do link your submissions (on your blog) in the comments section
or email us a copy to artzdescrap@yahoo.com.sg for a chance to win
a wonderful RAK from our sponsor.
Here are our DT's takes for this Challenge!
Designer Cabbie's textured Notebook with fibers on the spiral binder !!

or email us a copy to artzdescrap@yahoo.com.sg for a chance to win
a wonderful RAK from our sponsor.
Here are our DT's takes for this Challenge!
Designer Cabbie's textured Notebook with fibers on the spiral binder !!

Designer Felicia's Metallic embossed Notebook!!


Designer's Bree Colourful Altered Notebook


Designer's Candy Disneyland Inspired Altered Notebook using coupon booklets!!


Designer's Raechelle's Garden Inspired Altered Notebook

Now that you've seen all of our takes, do share with us your creative ideas!!!
Our RD Liza Yet is away at the moment but she will be back in June to share with us her lovely creations then.
You have till Thursday 30th April 2009 Midnight Eastern Time.
International scrappers are most welcome to join in.
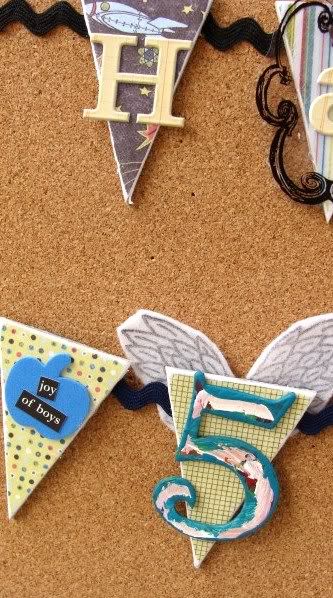
A Sneak Peek of our next tutorial!

Winner of the Door Hanger challenge
Thank you for all your Gorgeous submissions of your takes on the Door Hanger challenge! We hope you had fun! The Resident Designers have voted and the winner is ..................
Subscribe to:
Comments (Atom)


